User Guide
Once you have a running ReadyMap system following these instructions it's time to start serving some data!
Adding data to your server
The first thing you'll want to do is add some geospatial data to your server. You can see all of the files accessible to ReadyMap by clicking on the Files link.
If you have direct access to your machine you can add data directly to your data directory that is specified in your docker-compose.yml and it will automatically show up in your Files list. You can also upload data from your local machine by clicking the Upload button on the toolbar.
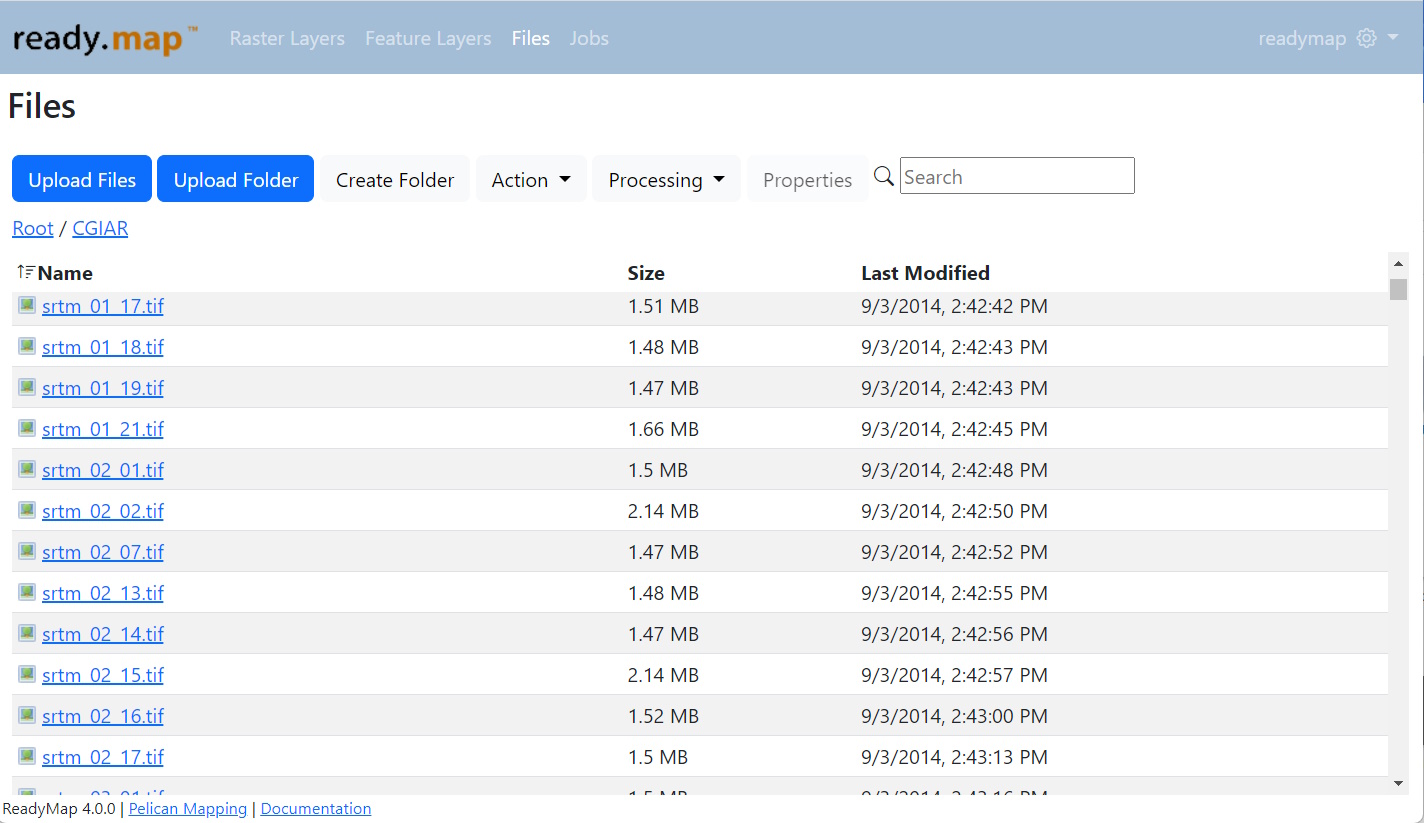 File Manager
You can rename, delete, download or move selected files by clicking on the Action dropdown.
You can also select a file and click the Properties button to get a preview of the file as well as geospatial properties of the file. This is also a good way to sanity check that ReadyMap will be able to read your file. For example, if you don't see an EPSG code or bounds, you probably need to upload an accompanying prj file.
 Properties
Creating Layers
Once you have your geospatial data loaded, you can create Layers in ReadyMap to show.
From the Raster Layers screen, click the New Layer button.
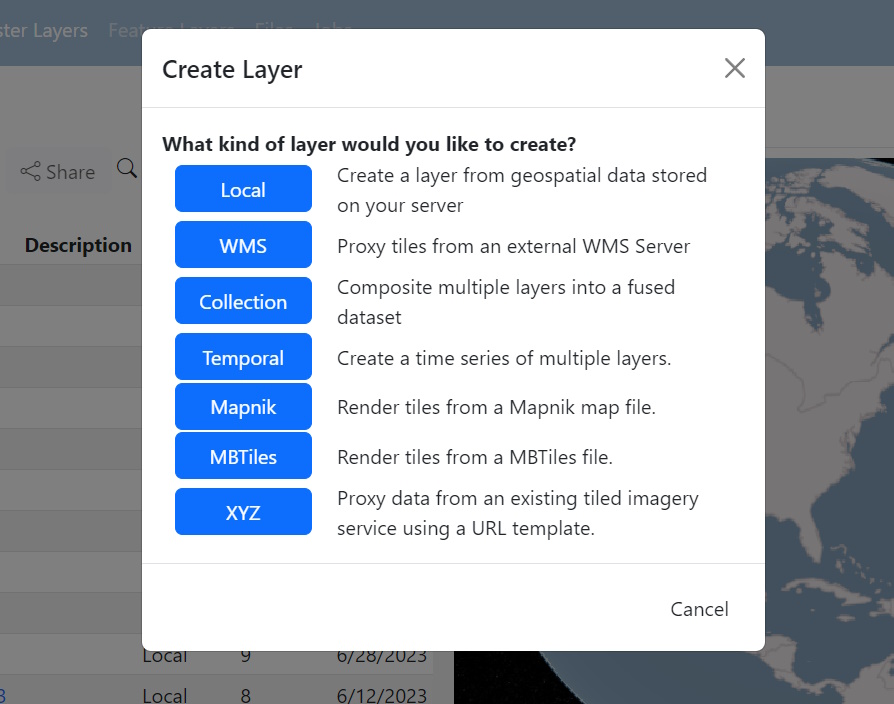
You'll are presented with a list of the various types of Layers that ReadyMap can create. Selecting a layer type will take you to a page to let you configure your layer.
Local Layers
To create a layer from geospatial files stored on your local server, choose Local Layer.
First, enter the name a description for your layer.
Next, you're asked to choose a projection for your layer. In general you should choose Global Geodetic unless you have a specific reason for targeting Spherical Mercator. Global Geodetic is the the preferred projection for osgEarth based application or a web application based on Cesium.
Next, select whether your data should be interpreted as imagery or elevation. Choose imagery unless you actually have single band elevation data such as a DEM, DTED or Geotiff file.
Now you need to choose what format you want to store your tiles in. If you are serving imagery you should choose either PNG, JPEG or WebP. If you are serving elevation to an osgEarth based application you should choose Tiff. If you are serving elevation to a Cesium application you should choose Cesium Quantized Mesh. You can also create elevation tiles for Mapbox clients with Mapbox Terrain RGB.
You can specify the time that this data was collected, if known. This information is useful for generating temporal layers that can be served as WMS-T.
In the advanced page you can specify the resampling method to use for your data. In general you can use Nearest for imagery and Average for elevation. If you choose nearest for elevation it will be faster than average but could produce an unwanted stair stepping effect if your data isn't exceptionally high resolution.
Hitting OK will create the layer and take you to the layer edit page.
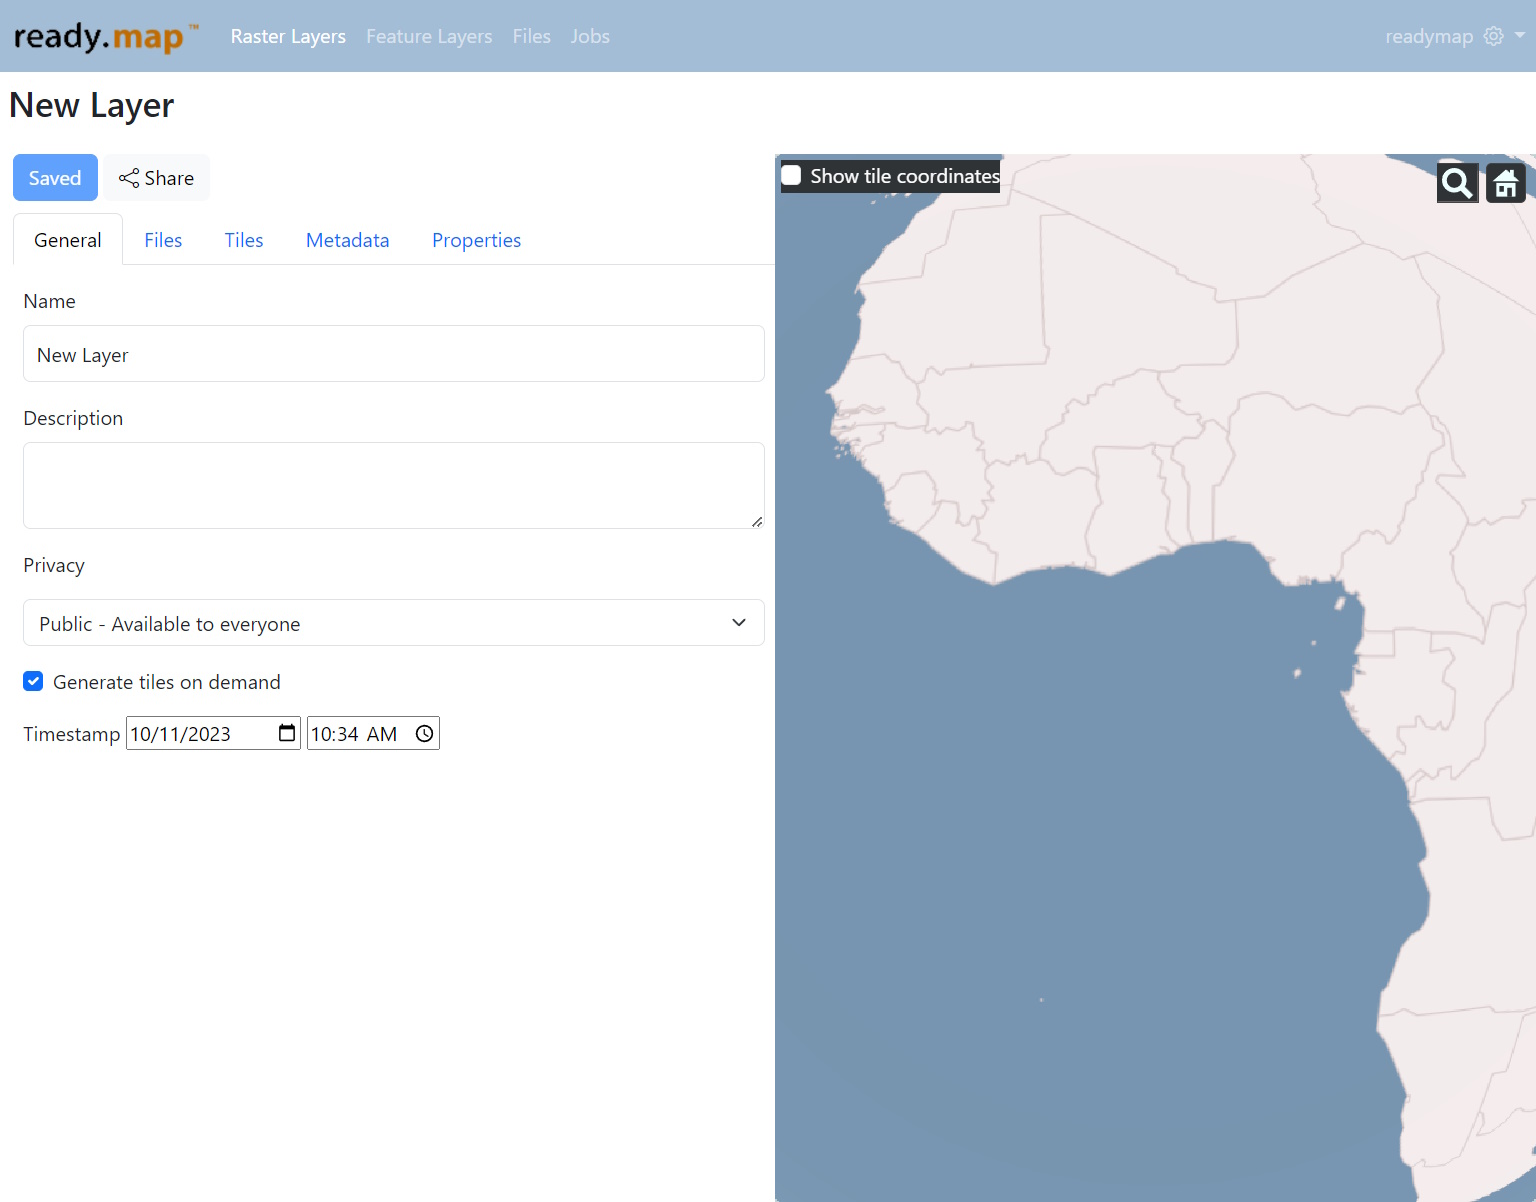
On the layer's edit tab you can change it's name and description, it's privacy setting and it's collection time.
There is also a setting that controls whether the layer generates tiles on demand or not. This is a very useful feature for being able to quickly visualize a layer, but use it with caution. If your dataset is very large it can really bog down your server and it's best to generate tiles manually from the tiles tab.
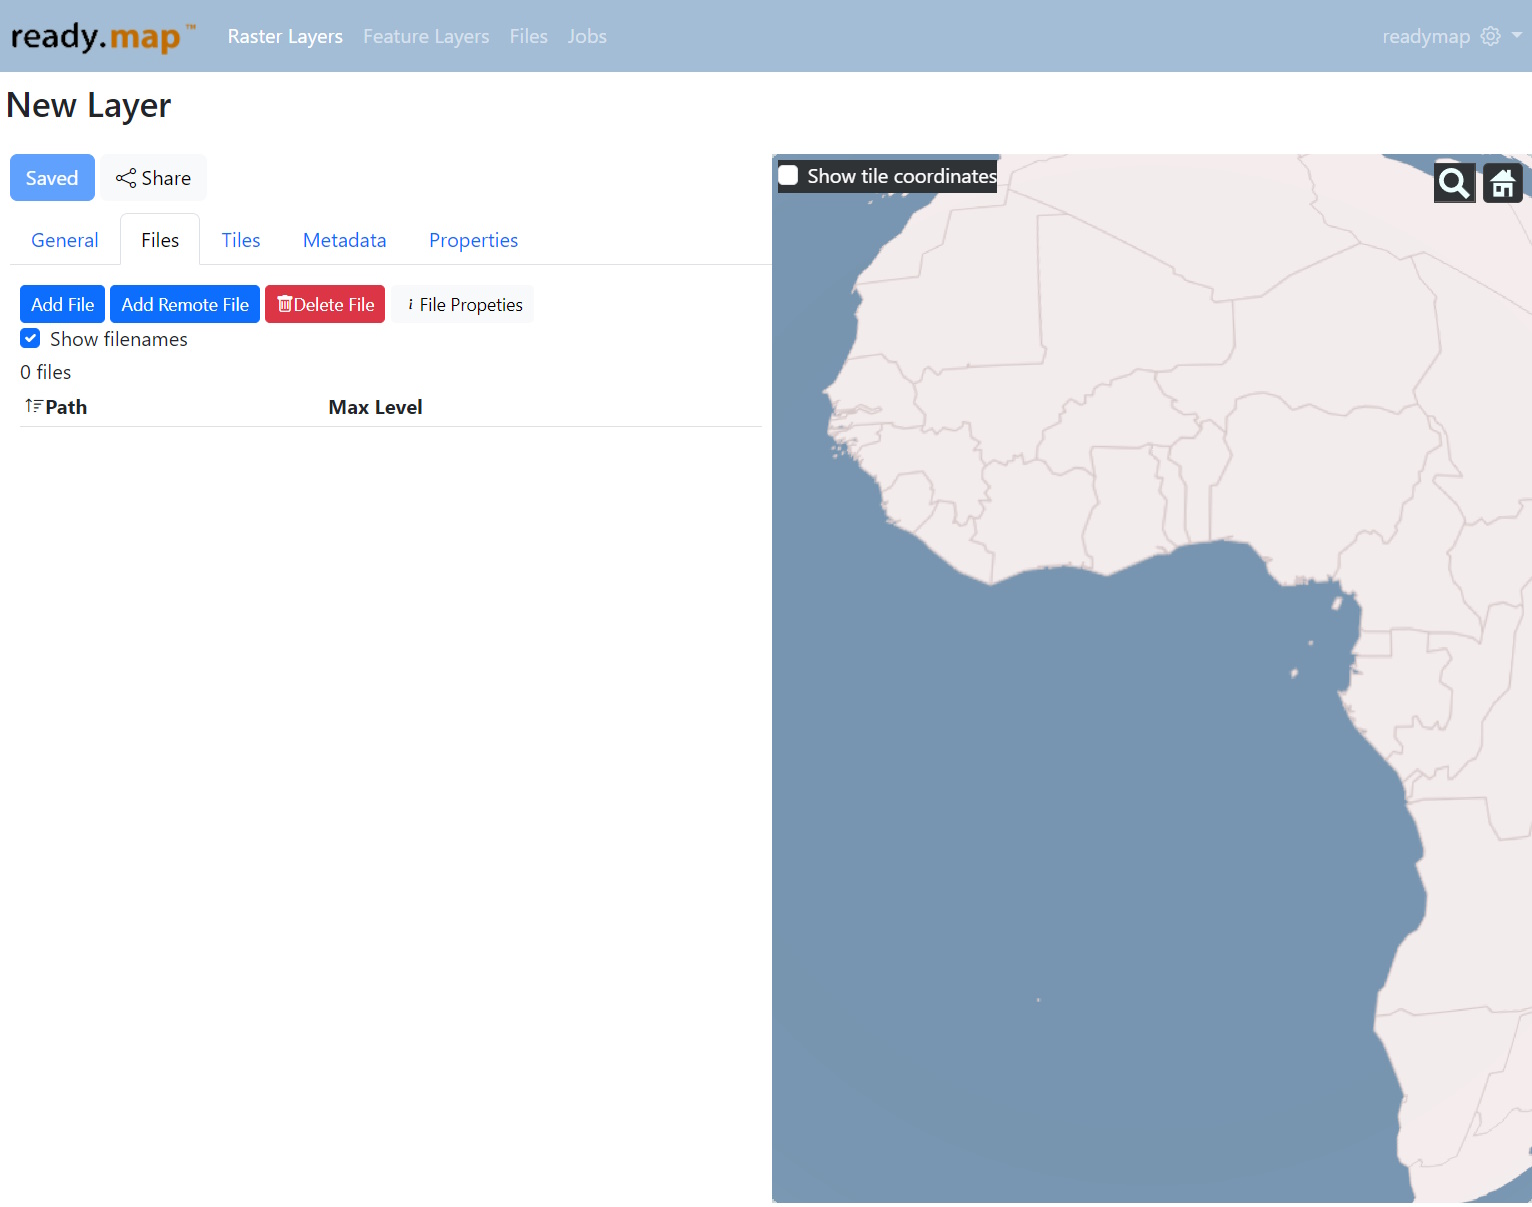
From the Files tab you can add files to your layer. Click the Add File button on the toolbar.
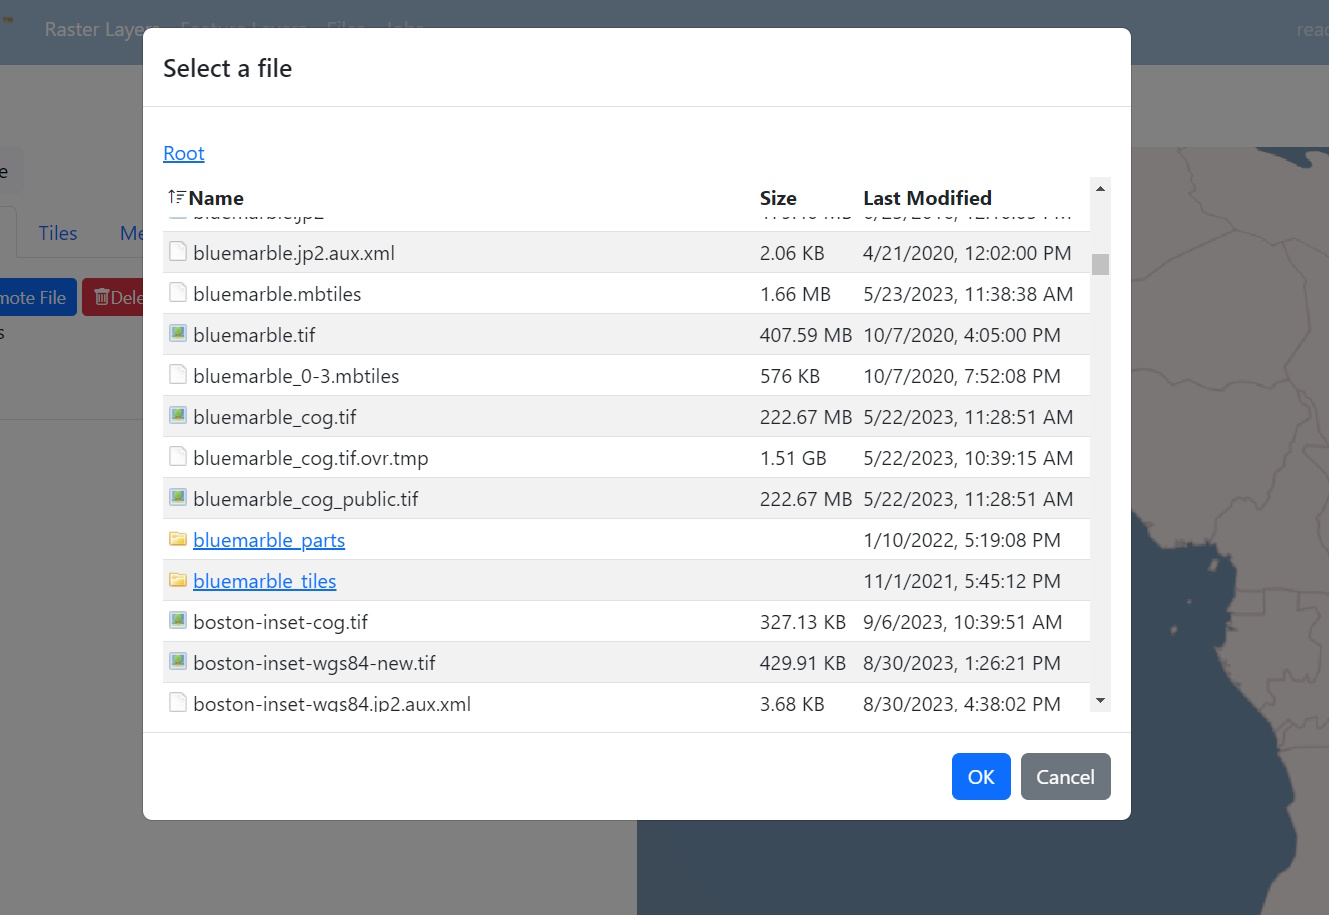
Select the files you want to add to your layer. In this case we will select the bluemarble.jp2 file. Files you add appear in the files list.
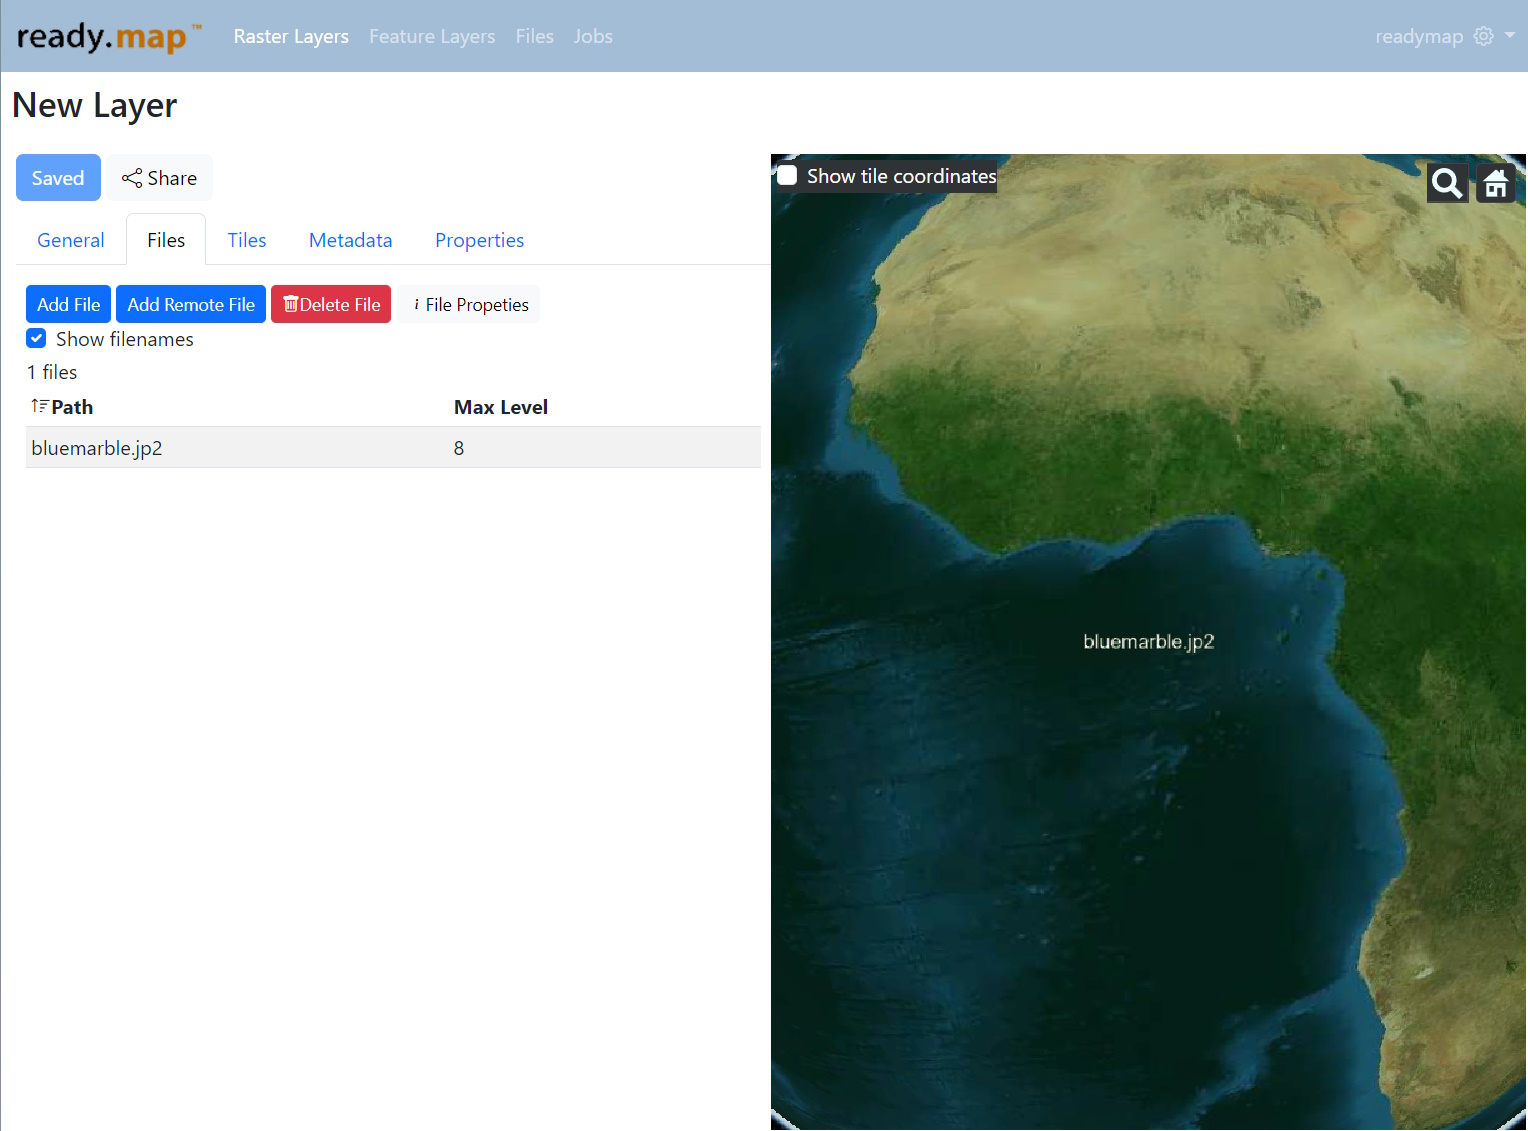
Once you are done adding files to your layer, refresh your browser and you should see map tiles automatically generating as you zoom around your map (if you've kept Generate on Demand turned on).
XYZ Layers
To proxy tiles TMS or Slippy map tiles from other servers and store the cached tiles on your server, you can use an XYZ Layer.
For example, you can proxy tiles from Tileserver GL to your ReadyMap server.
ReadyMap supports proxying Geodetic and Spherical Mercator tilesets. Make sure you select the projection that matches the tileset you are proxying.
When you create an XYZ Layer, you will be asked to provide a URL template that tells ReadyMap how to request tiles from the source server. The available parameters of the URL template are:
- {z} - The tile zoom level
- {x} - The x coordinate of the tile
- {y} - The y coordinate of the tile with the origin being the lower left. Use this for TMS servers.
- {-y} - The inverted y coordinate of the tile with the origin being in the upper left. Use this for slippy map style servers.
For example, you could proxy tiles from a slippy map server server PNGs using a URL template similar to
Warning
Ensure you have the proper permissions to proxy and cache tiles and that you are not violating any terms of service of the source server when you are proxying layers.
ReadyMap can be configured to use many workers to process tiles and can swarm a server when doing a tiling job, acting almost like a DDOS attack. If the server you are proxying isn't configured to to handle massive amount of simultaneous requests do not run tiling jobs on your proxied layer.
Managing Layer Tiles
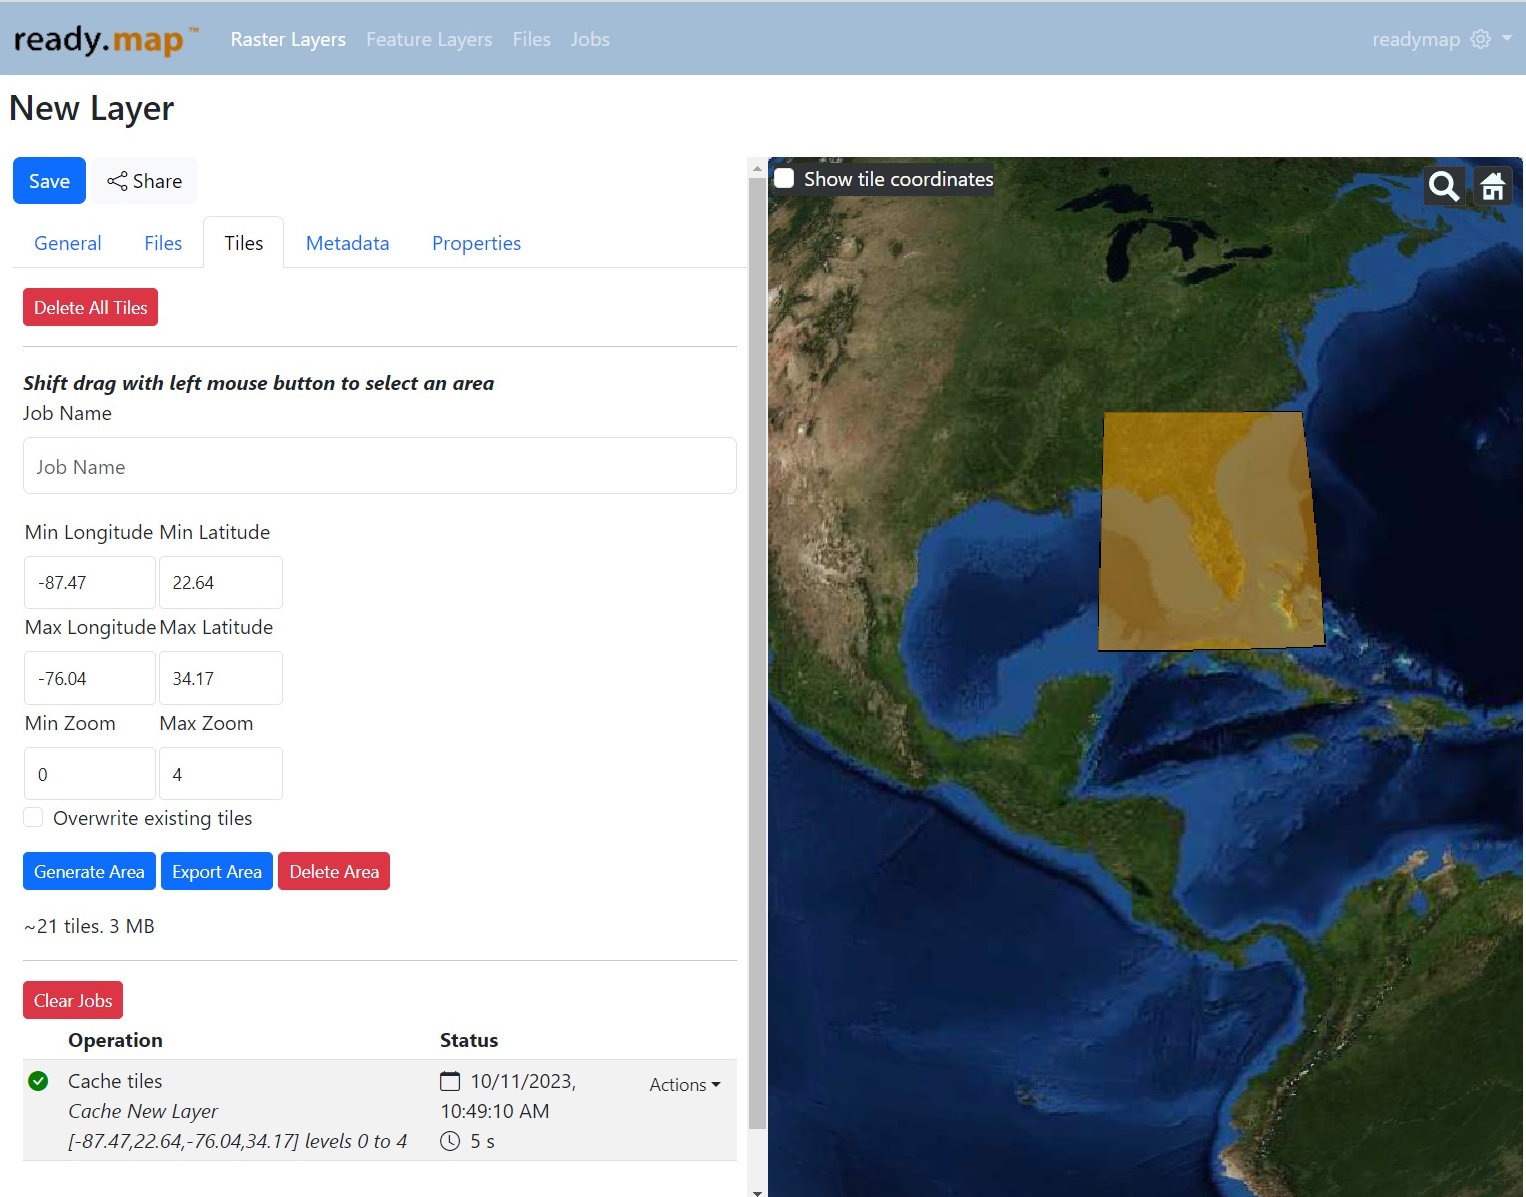
From the Tiles tab you can manage the tiles on your server.
You can select an area to tile by entering it's bounding coordinates or shift dragging out a rectangle on the map. Generate Area will generate all the tiles within the area. Export Area will generate an MBTiles file in your /data/exports directory containing the tiles within the area. Delete Area will delete any tiles on disk within the area.
Clicking Delete All Tiles will clear all of the tiles in this layer and mark the layer as needing to be published.
Each tile job you perform will show up in the jobs list. You can remove all old jobs by clicking Clear Jobs or remove an individual job by clicking the Actions drop down and selecting Delete.
Sharing layers
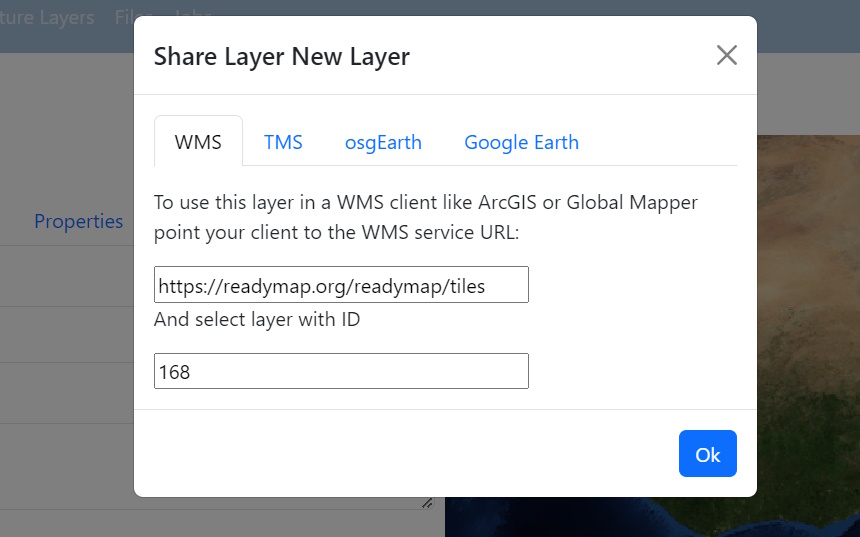
Readymap supports serving tiles to a variety of different applications. From the main layer page if you select a layer and choose Share you'll see a dialog with instructions on how to integrate your layer into common geospatial applications.
Feature Layers
From the Features page you can create Feature Layers. Feature Layers are different from Raster Layers in that they serve out raw vector data rather than rasterized versions of the data. When you click New Layer from the Features page you'll be presented with a page walking you through the feature import step.
First, enter the name and description for your layer.
Next, select the file you want to import, typically a shapefile. Files recognized as feature data will have this icon ![]() .
.
Finally hit OK to begin importing the layer into the ReadyMap database.
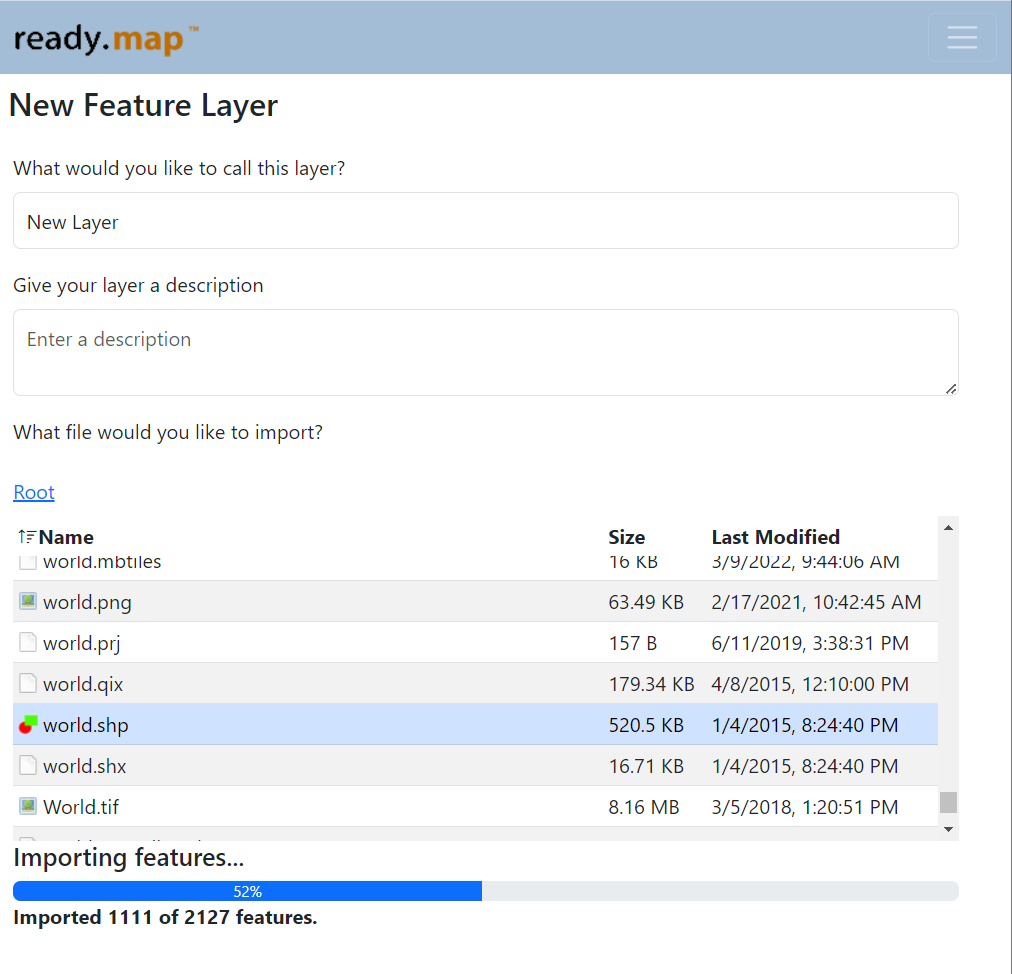
As the file imports ReadyMap will show you progress as it imports.
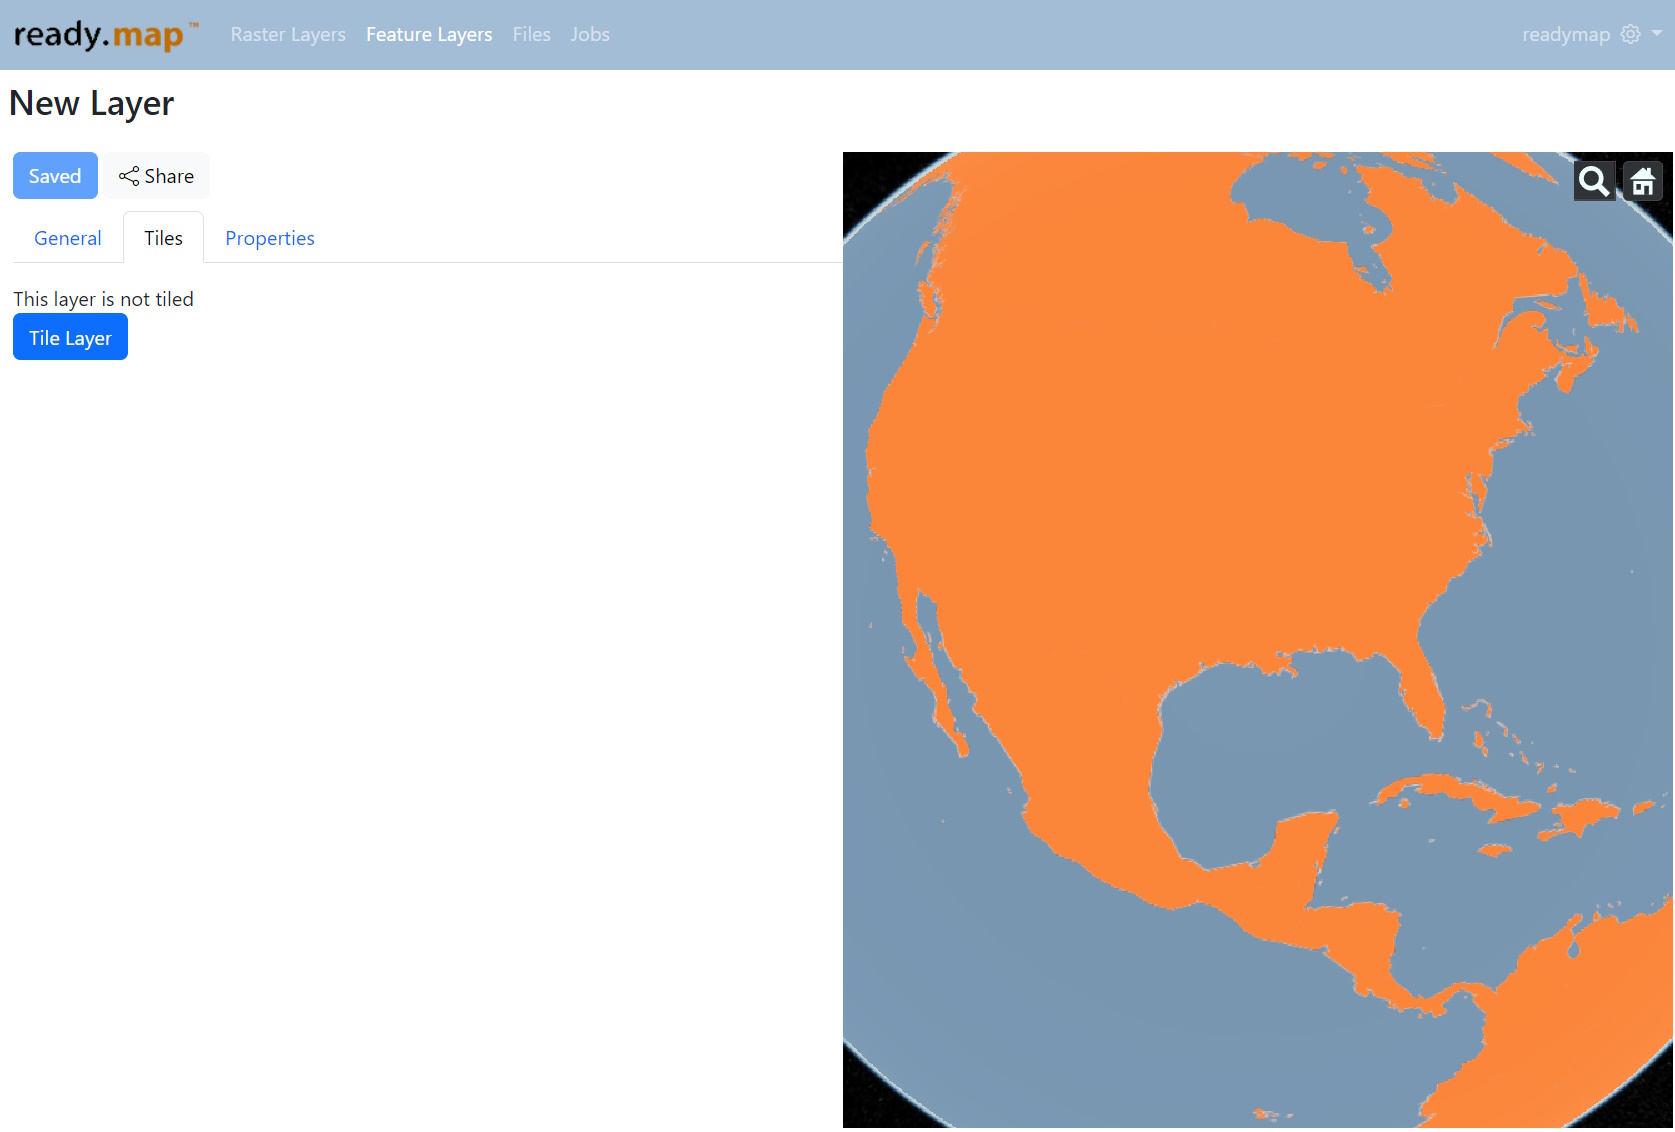
Once a file is finished importing, it is available using the WFS protocol which will work in the majority of GIS applications. For osgEarth based applications we can control how features stream in by tiling the layer. From the Tiles tab on the Feature edit page click Tile Layer.
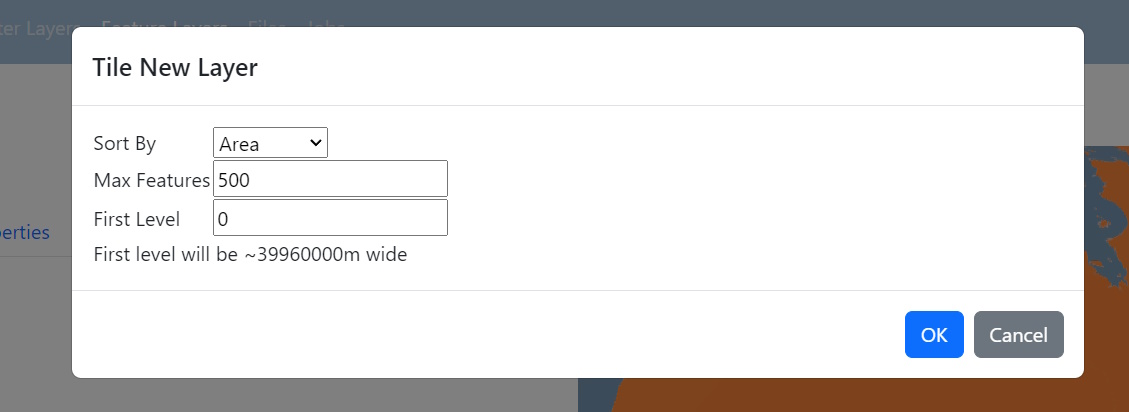
From the Tile dialog, you can choose how features will be sorted as they are placed into tiles. The Sort By selector will use the attributes in the feature and sort them in descending order. The Max Features selector is how many features to put in a tile before creating a tile on the next highest level down. First level should usually stay at 0 if you want to see the whole dataset as you steam in, but if you want features to show up later then you can increase this value.
For example, if we pick Area in this layer it will place 500 of the largest features in the root tile and then continue to place features, largest first, in children tiles.
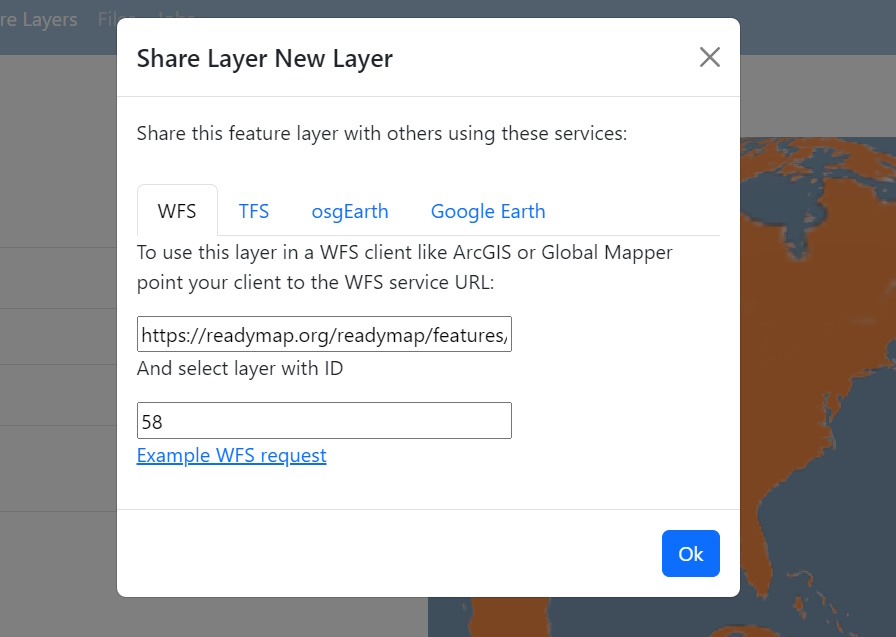
Once the tiling is complete you can use the Share button to ingest the Feature Layer into various geospatial applications.